Dear Readers:
Springtime is now ripe for getting outdoors and enjoying the crisp cool air before it turns unbearably hot. I thought I'd give you the free seminars held at Homestead Heritage for the rest of the year, plus a few more Spring things to do in the Waco/Central Texas area.
Homestead Heritage--Free Seminars held 10:00 to 11:00 at the General Store
April 2--Pest Control in the Garden
April 9--Flower Gardening
April 16--Canning and Preserving
April 23--Easter
April 30--Rainwater Collection
May 7--Controlling Weeds
May 14--Beginning with Chickens
May 21--Drip Irrigation
Brazos Nights--First Friday of the month, beginning in April--Indian Spring Park, Waco, Texas--7:00 p.m.
April 1--Texas Country with Jason Boland & the Stragglers, and Eleven Hundred Springs
May 6--Cinco de Mayo Celebration with La Ley 104.1 FM & guests
June 3--Waco Symphony Orchestra
July 4--HEB, Star 92.9 & ESPN 1660 present 4th on the Brazos with The Fabulous Thunderbirds, Carolyn Wonderland, 36th Infantry Division Band, Waco Community Band & HEB Fireworks!!!
Beasts 'n Blooms & Earth Day Too! @ Cameron Park Zoo on April 7th from 9:00 a.m. to 5:00 p.m.
This 7th Annual event allows visitors to enjoy the zoo, purchase plants, herbs, and flowers while children get to work with Master Gardeners, do arts and crafts and face painting.
For Earth Day activities, learn about recycling, habitat restoration, migratory bird information, animal enrichment and wildlife conservation.
Admission is $9 for adults 13 & up; $8 for seniors age 60 & up; $6 for children 4 to 12 years old; under 4 years, free. Military discounts are available.
For more information call 750-8415 or visit http://www.cameronparkzoo.com/
Easter Egg Hunts--April 23rd
Bledsoe-Miller @ noon
South Waco Park @ 10:00 a.m.
Dewey @ noon
If you know of other events in the Waco or Central Texas area, please leave a comment on this post!! Now, get outdoors and have some fun!!
Thursday, March 31, 2011
Monday, March 28, 2011
Composting 101 Revisited
Pat and I attended a free seminar on Composting held Saturday at Homestead Heritage. We got some clarification and some redirection on our composting process. Number one correction in our thinking is, if you use a pile to compost, it has to have enough mass to heat up. That is why ours was staying cold. It did get hot at one point, but I know I killed it by adding chlorinated water and having a small mass--see below. Saturday, Pat re-worked our pile to hopefully bring it into balance so that it'll work for us.
The following is what we learned in order to build a compost pile.
 |
| Newly reworked Compost Pile |
- The size of your pile should be at least 4x4x4. It is necessary to have enough mass for the pile to get hot. We were missing the volume.
- The bottom layer should be made of good sized sticks to lift the pile off the ground. This promotes air circulation. We did not do this step previously.
- Follow with brown matter--leaves, dried grass, etc. They recommend 50/50 mix of brown and green matter.
- Top with green matter--mown grass (they say not Bermuda since it tends to seed. The piles do not get hot enough to consume the seed. Add at your own risk! We will later this summer...we have no choice, as I said earlier finding green for us is tricky). Add water.
- The third layer should be topsoil or previously composted matter. Sprinkle some on top of the green to accelerate the pile.
- As you add each layer, add enough water so it is like a wet, wrung out sponge. Not too much. However, you'll want to add unchlorinated water as chlorine kills bacteria. And you want your pile to have a lot of bacterial action. However, because we did not have an in-line filter, we put regular garden-hose water on the pile anyway. Surely, by the time the pile begins to work, the chlorine will evaporate.
- Keep alternating brown with green until it is at least 4' high. In our picture you can see that ours is about a foot short. No matter, it has more mass than what I started out with, and it's better than nothing.
- Prepare to cover your pile during heavy rains. Too much water will drown the microbial action in your pile.
A few tips and recommendations are:
- It's okay to have the pile under a shade tree (I thought we needed the sun, but not so).
- Stick your hand in to see if it's getting hot. Be careful, if it is hot you'll know it quickly. It can get as hot as 180°!
- If adding manure, make sure the animals were not taking antibiotics---again, antibiotics kill bacteria and it will still be active in the manure. Avoid horse manure as their digestive systems do not completely break down seeds. The best animal manure is dairy cow as they are not allowed to have antibiotics on the milking line. Chicken and goat poop are fine, just know where it comes from. Commercial growers of chickens will inoculate often with antibiotic. Chickens raised by individuals most likely will not.
- Avoid cat and dog poop as they have lots of parasites which will not be killed in the composting process.
Once your pile gets to cooking, it is necessary to turn it. What Homestead suggests is moving the pile to another bin to do this. Use the same method as before adding more brown and green. Turn the outer corners of the pile first since the outside will decompose slower than the middle.
Depending upon how hot or cold the pile is, compost will appear anywhere from one to six months. Compost should be rich, dark brown like coffee grounds, and smell like earth. Add the compost to your garden as soon as it is ready.
Homestead adds theirs about 6 weeks prior to planting. They layer the compost on top of the garden bed and put mulch over it. This allows the soil time to "digest" the composted materials. Mother used to turn it into the soil. I'm thinking that's how we'll do it, but you never know. That will be on a future post.
For now Pat and I are hoping to cook up some compost!
Saturday, March 26, 2011
Spring Blooms--March 2011
The Mountain Laurel blooms are so beautiful and fragrant. However, this year we did not get as many as we usually have. It could be due to Pat's pruning efforts, but I wouldn't change a thing. The tree is gorgeous--we should have more blooms next year!
 |
| Mountain Laurel Bloom almost spent |
 |
| Newer Mountain Laurel Blooms--so fragrant! |
The Mountain Laurel blooms are so beautiful and fragrant. However, this year we did not get as many as we usually have. It could be due to Pat's pruning efforts, but I wouldn't change a thing. The tree is gorgeous--we should have more blooms next year!
 |
| First Bearded Iris |
 |
| Another view |
All of mom's Irises are doing beautifully at the west end of the house! Pat was thinking we wouldn't get a show, but there are a ton of "wrinkled" leaves indicating future blooms. That is how I can tell if an iris will bloom...the leaves get wrinkles in them, and sure enough, a few days later a bloom begins to emerge.
 |
| More Irises to follow! |
 |
| Dianthus & Strawberry Begonias |
I'm very proud of my efforts with the Dianthus and Strawberry Begonias. I pinched back all of the frost-bitten leaves on the Dianthus instead of Pat. He's more tender and gentle than I am...I'm pretty radical when I pinch back plants, and they usually do better when I do it! Quite possibly the only thing I'm good at gardening-wise! Pat also asked me to add more potting soil at the bottom of the Strawberry Begonia, and I managed that all by myself! It's perking up nicely, although I do think I needed to divide it. Pat said no. Just wait until I have another day off---I think I'll do it anyway!!
 |
| Antique White Rose |
This is the rose bush I blogged about having black spot so badly. Well, the lack of rain has helped it recover. Look at all the future blooms this baby has!
 |
| More blooms to come! |
Sunday, March 20, 2011
Circle Garden & Succulents!
On Thursday, Pat and I trekked out to Bonnie's Greenhouse to pick up plants for our circle garden. When I turned a corner, there were all sorts of succulents wanting to be purchased. Remembering posts from one of my favorite bloggers, Pam Penick, I decided to give them a try knowing I had an unused strawberry pot begging for some plants! I am amazed that succulents do so well here. In Abilene, we had a terrible time keeping any sort of succulent growing--most likely due to the "real" winters there!
In our rock garden, we have had some sort of succulent growing at the base of our rose bush for years now. I suppose that when the leaves fall and cover them up, they offer just the right protection during the winter. This spring they are really taking off...so why not try a container of succulents!!
Update on Gardening Goals--Circle Garden
Pat and I worked Thursday and Friday--okay, maybe Pat worked harder than I did--cleaning out the circle garden and planting new plants. Below is a picture with all the plants labeled except for the society garlic which you cannot see. The society garlic has been nipped back quite a bit due to our hard freezes. However, we do see sprigs coming up so we do have some hope! Pat also dug up some Russian Sage and I potted those for transplanting later. Finally, he relocated some Turk's Cap among our thicket to add a splash of color along the edge of our property.
I can hardly wait!!
 |
| Inspired by Digging--Pam Penick, I am going to try growing some succulents! |
 |
| Finished Succulent Garden |
Update on Gardening Goals--Circle Garden
Pat and I worked Thursday and Friday--okay, maybe Pat worked harder than I did--cleaning out the circle garden and planting new plants. Below is a picture with all the plants labeled except for the society garlic which you cannot see. The society garlic has been nipped back quite a bit due to our hard freezes. However, we do see sprigs coming up so we do have some hope! Pat also dug up some Russian Sage and I potted those for transplanting later. Finally, he relocated some Turk's Cap among our thicket to add a splash of color along the edge of our property.
 |
| Circle Garden--cleaned up and ready for Spring! |
Friday, March 18, 2011
Starting Seeds
Yes, it's probably late to be starting seeds indoors now, however I have a good reason. I do not know how to do this, and my first attempt didn't work out! Pat told me to put the seeds in pots and put them on the windowsil. A gardening expert, Dick Raymond, said, "Don't ever put seeds in pots, and don't ever put them on the windowsil!" Okay. So now I'm trying his method!!
I've chosen to experiment with Cilantro seeds because it really doesn't matter when you plant them. In fact, it probably isn't a bad idea to plant several plants in your garden at different dates in order to have fresh Cilantro until frost. I purchased the seeds from Homestead Heritage, and they claim to be "slow" bolt which is even better. We tend to lose our Cilantro throughout the season due to the Texas heat and bolting.
Here are the directions for starting seeds indoors:
 |
| Soil, container, seeds, & directions! |
Here are the directions for starting seeds indoors:
- Start with good potting soil already moistened. Have seeds, container, a tray, and a wood block for packing at hand.
 |
| Tamp dirt down before planting seeds |
- I used a mushroom container for this project and poked holes in the bottom for drainage. I also had another takeout tray I'm using for the saucer. The key, according to Raymond, is to keep the seeds moist and warm. He also says water from the bottom...so now I'm set.
- Add moistened dirt and tamp down. Plant seeds. Cover with dirt. Tamp down again.
- Water well with a squirt bottle and put in a plastic bag. Place the seedling on top of the refrigerator and check periodically for sprouting seeds.
 |
| Water well and cover with a plastic bag. Wait 10 to 14 days and there should be sprouts!! |
I started this project on March 13th so it will be a few more days before I see sprouts. So far the soil is staying moist, and I have had to add some water to the tray, so I'm hoping this is a good sign!! I'll post an update when I see life!
Wednesday, March 16, 2011
Eddy Series--Our Terrain
Our youngest came home for a visit over spring break. He is currently enrolled in a soils class at Stephen F. Austin State University--Axe 'Em Jacks!! This is his last semester [please pray for good grades]--and we're loving that!! We are also loving the fact that Matt has to collect and analyze some soil samples as a requirement for this class. When he mentioned this way back in January, my first question was: "How deep?" Turns out he needed to go three feet deep.
I'll let the pictures tell the rest of the story, but first here is a little research about our soil:
While Matt picked and dug at the soil, I stood by with my camera to get a picture of the action! Pictures are a part of the assignment, too. I helped some by removing rock from the soil he would replace in the hole. This took about 2 to 3 hours.
Finally, Matt asked me to take a few specific pictures to send to the professor. At that point he was only about 18" deep and had decidedly gone as far as he could without a jack hammer. Yep, the rock wasn't budging. And as Matt chipped away at it, there was even more white chalk underneath.
Monday morning Matt was delighted to hear that his professor could see "3 horizons" so he had actually dug deep enough. Yes!!!
 |
| My son Matt collecting soil samples for class. Notice the depth of the hole. Notice the tool. When I say rock, I mean rock!! |
I'll let the pictures tell the rest of the story, but first here is a little research about our soil:
- We live on the west side of I-35 in southern McLennan County. Our area is known as the "Eddy Series" which consists of shallow to very shallow, well drained, moderately permeable soils. Yes it does!
- Taxonomy class is loamy-skeletal, carbonatic, thermic, shallow. Hmmm...there is a familiar ring to this analysis.
- Our soil ranges from brownish gray to dark grayish brown in color. Check.
- The depth of our soil ranges from 3 to 14 inches thick over chalky limestone. Yes, we found this out when we rented the ditch witch to dig an electrical trench. A job that should have taken 20 to 40 minutes took 3 hours. I wish I was kidding.
- The whole soil contains 35 to 50% chalky limestone fragments by volume. Yes it does!
- The fragments range from very weakly cemented to strongly cemented. Agreed.
- I could go on....but I won't. We have very rocky soil out here!
 |
| Plan B--bring out rock bar. Plan C--"Do you think we can rent a jack-hammer?" We would have, but it was Sunday! |
While Matt picked and dug at the soil, I stood by with my camera to get a picture of the action! Pictures are a part of the assignment, too. I helped some by removing rock from the soil he would replace in the hole. This took about 2 to 3 hours.
 |
| "Yeah....I think I hit bottom!!!" says Matt. |
Monday morning Matt was delighted to hear that his professor could see "3 horizons" so he had actually dug deep enough. Yes!!!
Sunday, March 13, 2011
Spring Blooms & Butterflies
What a lazy Sunday afternoon! I have had a great time chasing butterflies and watching my poor son dig through rock to complete an assignment for his soils class. I'll post that later, but for now...I hope you enjoy the pictures!!
 |
| Gorgeous Pansies--2011 |
 |
| Yellow Swallowtail on Bradford Pear--2011 |
 |
| Another view of the Yellow Swallowtail--2011 |
What a lazy Sunday afternoon! I have had a great time chasing butterflies and watching my poor son dig through rock to complete an assignment for his soils class. I'll post that later, but for now...I hope you enjoy the pictures!!
Saturday, March 12, 2011
Spring Blooms--Bradford Pear
Our Spring Beauty
 |
| Bug on Bradford Pear Blooms--2011 |
 |
| Sky view--2011 |
The Bradford Pear comes from Korea and China and was grown commercially in the 60s. In the springtime it is our first bloomer along with the native Redbud tree, and is covered in lovely white blossoms. In the fall there is no lovelier turn of a leaf than our Bradford. The leaves turn from green to deep maroon with a splash of orange. The fall colors never dissapoint. In the summertime the shade is always welcomed, and the tree in the backyard is actually helping to keep my kitchen comfortable.
Now for a few problems:
According to some of the posts in surf-land, the Bradford pear is a fast-growing tree that puts off suckers, has a shallow root system and is prone to splitting during heavy freezes. So far, we do not have any of those issues, but the posts go on to say that the Bradford pear has a short lifespan of about 20 years.
 |
| So lovely in the springtime! |
The trees in our yard are at least 13 to 15 years old. We have not seen any limb damage, any suckers, or any splitting of the trunk. All I can say about our previous homeowners is that they did consult a local nurseryman for all of their purchases, and for the most part, researched what was planted fairly well.
Thursday, March 10, 2011
Composting: A Gift to Your Garden
Pat and I have been composting on and off for over 15 years now. It truly isn't complicated, but to be successful, dedication is key. I am currently reading two books: Fertilizers for Free: Updated and Revised (1999) by Charles Siegchrist, Storey Publishing; and Don't Waste Your Wastes--Compost'em: The Homeowner's Guide to Recycling Yard Wastes (1991) by Bert Whitehead, Sunnyvale Press. Yes, both publications may be considered "old" however, since nature is the ultimate composter--I dare say nothing much has developed in the last 10 to 20 years!
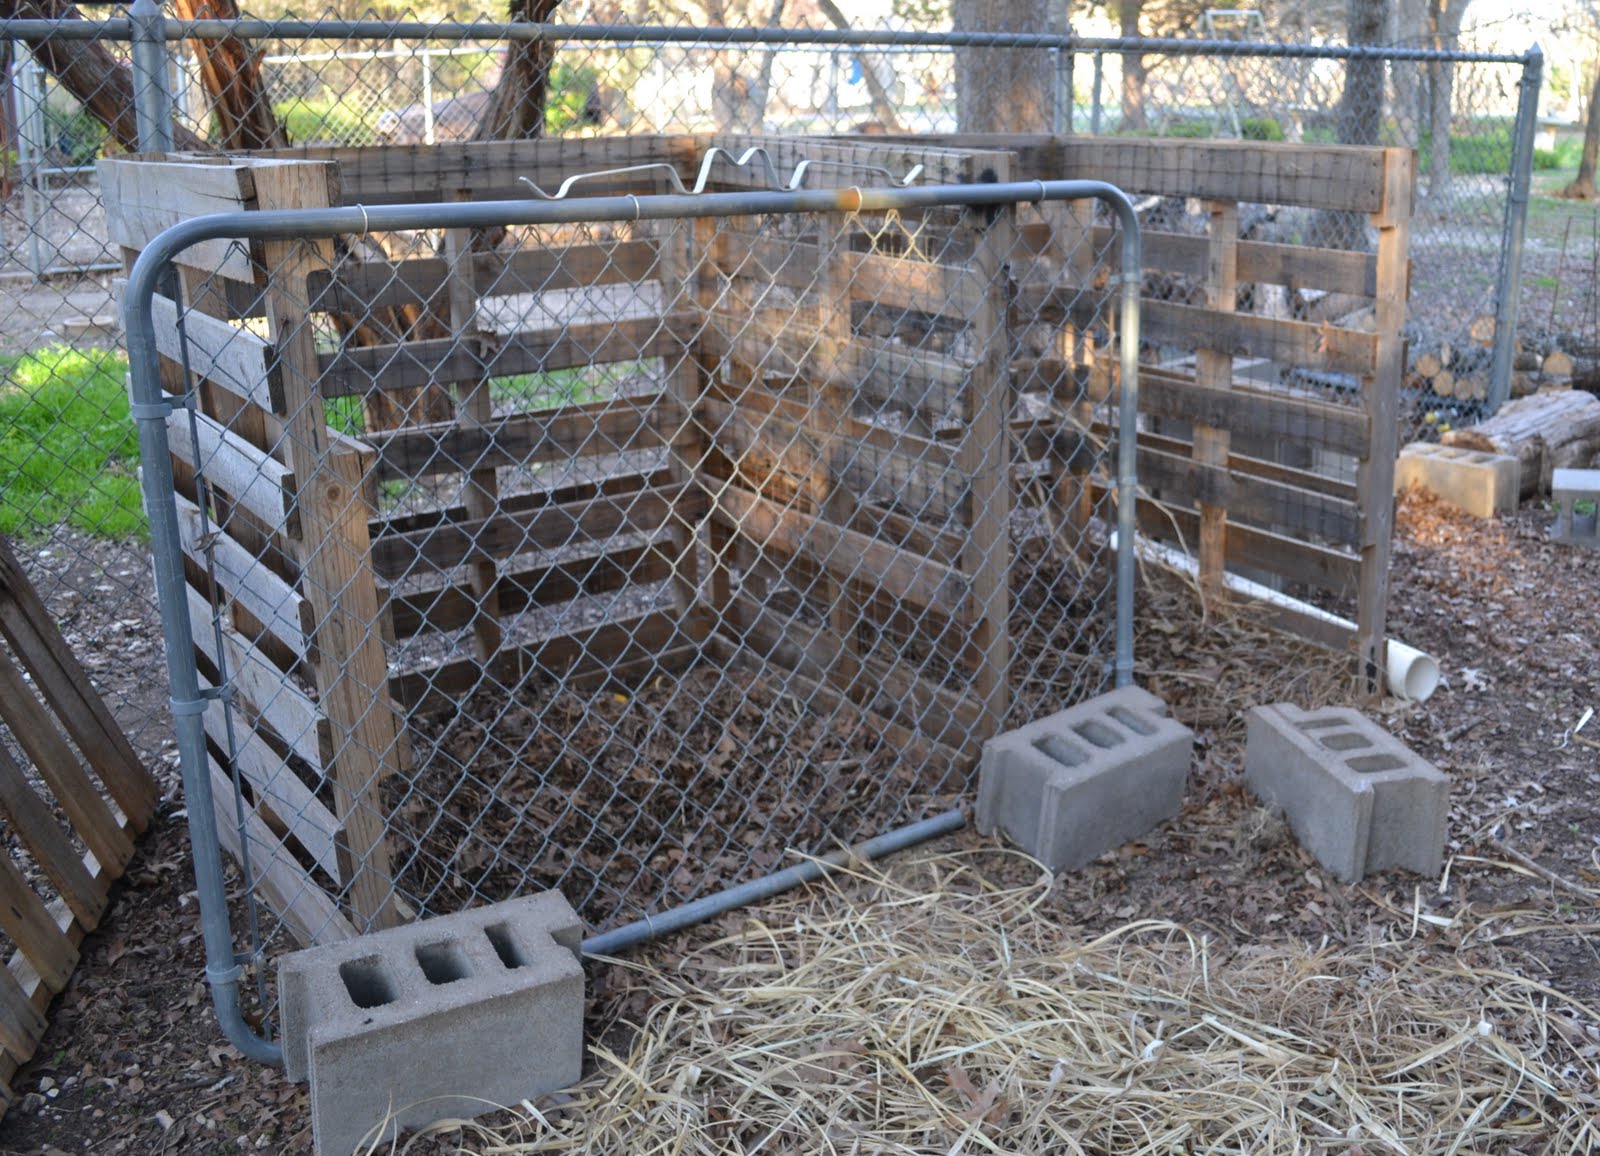 |
| 2-Stage Compost Bin. Bin on the left is the "working" bin. Bin on the right is currently the "holding" bin, but it needs to be cleaned out to be used as the "finished" bin. We had a third bin, but the cinder blocks were used for the new onion bed! |
There are a few basics to composting, and because Pat and I are still perfecting what nature does so well on her own, I consider this topic to be a journey as well. One new thing I did learn from Don't Waste Your Wastes is I was under the impression that a cold compost would not work. In otherwords, compost piles aren't working unless they're hot. I'm proving this to be false since the composting I've done during the winter has been "cold." According to Whitehead, there are 3 microorganisms that work under certain conditions: psychrophile works under "cold" conditions; mesophile works under warm conditions; and thermophile works under hot conditions. Whitehead does say that hotter compost piles are more efficient, and I know this to be true. However, what I am seeing in my "cold" pile right now is working--I do have humus--not much--but I do have humus! My ultimate goal is to get this compost pile "cooking" so that I can produce a hefty amount of organic matter this planting season. This weekend I plan to remove some of the lovely dirt to my "resting" area so it can rest and cure.
- Build a simple structure to house your compost that allows air to flow in. It isn't necessary to purchase a composting bin, however, they are nice! We've used cinder blocks, pallets, chicken wire, or a simple pile of stuff behind the back fence--completely open. Since we live in the country, it is essential we secure our pile so our "green" isn't eaten overnight by dogs and vermen!
- Make sure the pile is turned every 3 to 5 days and add some water if it dries out. Ours dries out a lot during the summer months.
- Use 75% brown matter to 25% green matter [City of Waco Recycling Division Composting Wheel]. Anything that looks brown, probably is brown. Anything that looks green, probably is green. Freshly mown grass is green. Dried out grass is brown.
- I like to layer brown matter and green matter like a lasagne to start with. Top off with a little more brown each time you add green. I find that adding leaves that have started to decompose, or mold, works well and helps the pile compost.
- If it isn't time to turn the pile yet, be certain to bury green matter within the pile. Bury it so that vermen do not smell it and to help it decomposes faster and more efficiently...and to reduce fly larve.
Tuesday, March 8, 2011
Gardening Goals 2011--March Update
Since March is pretty much a great month to get out and get the hands dirty, I thought I'd update you on our Gardening Goals progress!!
Goal #1: Make a large vegetable garden in the front yard where there is full sun
 |
| Go, Pat! Go!! March 2011 |
I must say, things are coming along nicely for Goal #1, especially since Pat purchased a used Troy-Bilt Pro Line CRT 160 Roto-Tiller! We have been wanting one for a long time, but held off because mainly because we thought it'd be next to impossible to till a garden with our rocky terrain. Boy were we wrong! Just look at Pat!! Go, Pat, Go!!!
And look at this dirt! It drains, it crumbles, and it clumps nicely then crumbles again! A vegetable gardener's dream!
 |
| Awesome Dirt--we'll send a sample to Texas A&M Soil Lab for analysis |
Not only has Pat been busy tilling a vegetable garden, but he took our cinder blocks and made an onion bed out front as well. We had planted onions in the same spot for several years in the herb garden, and they turned out nicely until the last couple of years. Either they were not planted at the right time, or we failed to amend the soil properly. Whatever the reason, our onion crop has been scant to say the least.
 |
| New onion bed |
Other goals that are in progress, include:
2. Cut down at least 4 trees and reorganize wood pile: We've cut down one tree that fell during the snow and re-organized the woodpile.
3. Tidy all bulb gardens: Why bother what was blooming just fine? We'll probably nix this one!
4. Cindy wants to re-work Turk's Cap garden: I've gotten a good start, but have a long way to go. I've dug up as many Parrot Lilies as possible, and more are growing as we speak. A sort of Parrot Lilies' revenge most likely. I need to rake out the leaves, trim the salvias some more as I was waiting for them to leaf out some before making drastic cuts, and purchase more plants!
5. Replace and add more salvias: Goes with #4, but there are many other areas in the yard we could use some salvias. The cost of plants is most likely what will keep this lofty goal in check.
6. Add more lovely herbs to the herb garden: Pat has added some lettuces so far. There haven't been many herbs out in pots to buy. We definitely want to buy some Lemon Balm. Pat did buy some Yarrow, but that is planted out front in full sun.
7. Read Herb Gardening book and use herbs for soaps, oils, and such: I've started this somewhat.
8. Get a few Guineas: Waiting for our son Matt to graduate from SFA and move back home to help out with this project since he is---The Chicken Man!!
Monday, March 7, 2011
February 2011 Forecast Prediction -- Follow Up!
Admittedly, this post is a little overdue. However, life is getting busy with the testing season upon students and teachers. Nevertheless, February was a roller coaster month with frigid temperatures, rolling blackouts to conserve energy, snow, and balmy days suitable for tanning and Bermuda shorts!
Actual Prediction for February 2011
It is my prayer and hope that if we do not get much rain in January, that we have a good chance of rain in February since the humidity was higher today, and there were some clouds--although white and fluffy. Well, it looks like prayer and hope will be needed since there was absolutely no rain in the month of February 2010! Yikes. The average high [2010] was 57° and the average low was 37°.
February, oh February, month of love--be kind to us. Be mild and rain just enough to keep the grass and plants happy!!
February 2011 Actual
High: 64° to 82°
Low 14° to 23°
Rainfall 0.94"
Wind 16 to 32 mph
Hypothesis Proved/Disproved
I cannot say since I never really committed to an actual prediction. I believe I can interpret my intention as thinking February would be mild. Well, it was to a certain degree if discounting the absolutely frigid days and the unexpected snow holiday!! I prayed for rain, and we did get that! Based upon the experiment, though, there was no way to predict the cold weather, so I shall err on the side of my hypothesis being disproved.
 |
| Snow Day--February 4, 2011 |
Admittedly, this post is a little overdue. However, life is getting busy with the testing season upon students and teachers. Nevertheless, February was a roller coaster month with frigid temperatures, rolling blackouts to conserve energy, snow, and balmy days suitable for tanning and Bermuda shorts!
Actual Prediction for February 2011
It is my prayer and hope that if we do not get much rain in January, that we have a good chance of rain in February since the humidity was higher today, and there were some clouds--although white and fluffy. Well, it looks like prayer and hope will be needed since there was absolutely no rain in the month of February 2010! Yikes. The average high [2010] was 57° and the average low was 37°.
February, oh February, month of love--be kind to us. Be mild and rain just enough to keep the grass and plants happy!!
February 2011 Actual
High: 64° to 82°
Low 14° to 23°
Rainfall 0.94"
Wind 16 to 32 mph
Hypothesis Proved/Disproved
I cannot say since I never really committed to an actual prediction. I believe I can interpret my intention as thinking February would be mild. Well, it was to a certain degree if discounting the absolutely frigid days and the unexpected snow holiday!! I prayed for rain, and we did get that! Based upon the experiment, though, there was no way to predict the cold weather, so I shall err on the side of my hypothesis being disproved.
Subscribe to:
Posts (Atom)